Book Review: Getting Started With Arduino

Este libro corto y de fácil comprensión (se lee en menos de una hora) es una magnÍfica entrada al mundo de la electrónica, Arduino y Physical Computing. “Getting Started with Arduino” (IBSN 978-0-596-15551-3) está escrito por uno de los cofundadores de Arduino, Massimo Banzi, que nos introduce en el mundo de la electrónica con simples ejemplos.

This short and easy to understand book (read in less than an hour) is a magnificent introduction to the world of electronics, Arduino and Physical Computing. “Getting Started with Arduino” (IBSN 978-0-596-15551-3) is written by one of the co-founders of Arduino, Massimo Banzi, who introduces us into the world of electronics with simple examples.

Personalmente había leído otros libros sobre el tema antes que éste, pero desde luego para una persona que quiere empezar con Arduino éste es su libro. A lo largo de los 7 capítulos el autor nos lleva desde la instalación de Arduino (Windows y MacOS), la forma de pensar, detalla la plataforma Arduino y realiza diversos ejemplos utilizando LED, Pushbutton, Breadboard entre otros componentes.

I personally had read other books on the subject before but for someone who wants to get started with Arduino this is the book. Along the 7 chapters the author leads us from Arduino installation (Windows and MacOS), how to think about it, detailing the Arduino platform and performed several examples using LED, Pushbutton, Breadboard among other components.

Recomiendo este libro por varias razones:

  • Es fácil de leer ya que este pensado para personas sin conocimientos técnicos.
  • El autor es todo un experto.
  • Los ejemplos son prácticos y fáciles de seguir y en poco tiempo estarás creando gadgets que se conectan a Internet.

I recommend this book for several reasons:

  • It is easy to read because is designed for non-technical people.
  • The author is an expert.
  • Examples are practical and easy to follow and soon you’ll be creating gadgets that are connecting to the Internet.

Definitivamente una obra de obligatoria lectura para cualquier persona que quiera entender sobre Physical Computing, Arduino o de electrónica en general.

Puntación (1 rosa, muy malo / 5 rosas, muy bueno): 5 Rosas (Lectura Obligatoria)

Definitely a mandatory reading for any people who wants to understand Physical Computing, Arduino or electronics in general.

Score (1 pink, very bad / 5 roses, very good): 5 Roses (Mandatory Reading)

— Simon Roses Femerling
Posted in Books, Hacking, Technology | Tagged , , , | Leave a comment

Nessus Report Tricks

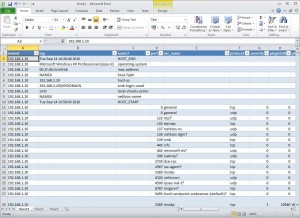
El escáner de vulnerabilidades Nessus es una potente herramienta para auditar sistemas aunque flojea en la generación de informes. En este post comentaré algunos trucos que utilizo para generar informes de forma rápida con la ayuda de Microsoft Excel 2007 o 2010 (Importante: esto sólo funciona con la versión Excel 2007 o superior).

Nessus vulnerability scanner is a powerful tool for auditing systems although is weak in reporting generation. In this post I will comment on some tricks I use to generate reports quickly with the help of Microsoft Excel 2007 or 2010 (Important: this only works with Excel 2007 or higher).

Una vez realizamos un escaneo mediante Nessus debemos guardar los resultados en formato XML para que podamos abrirlo con Excel.  Estos son los pasos:

Once we make a scan using Nessus we must save the results in XML format so that we can open it with Excel.  These are the steps:

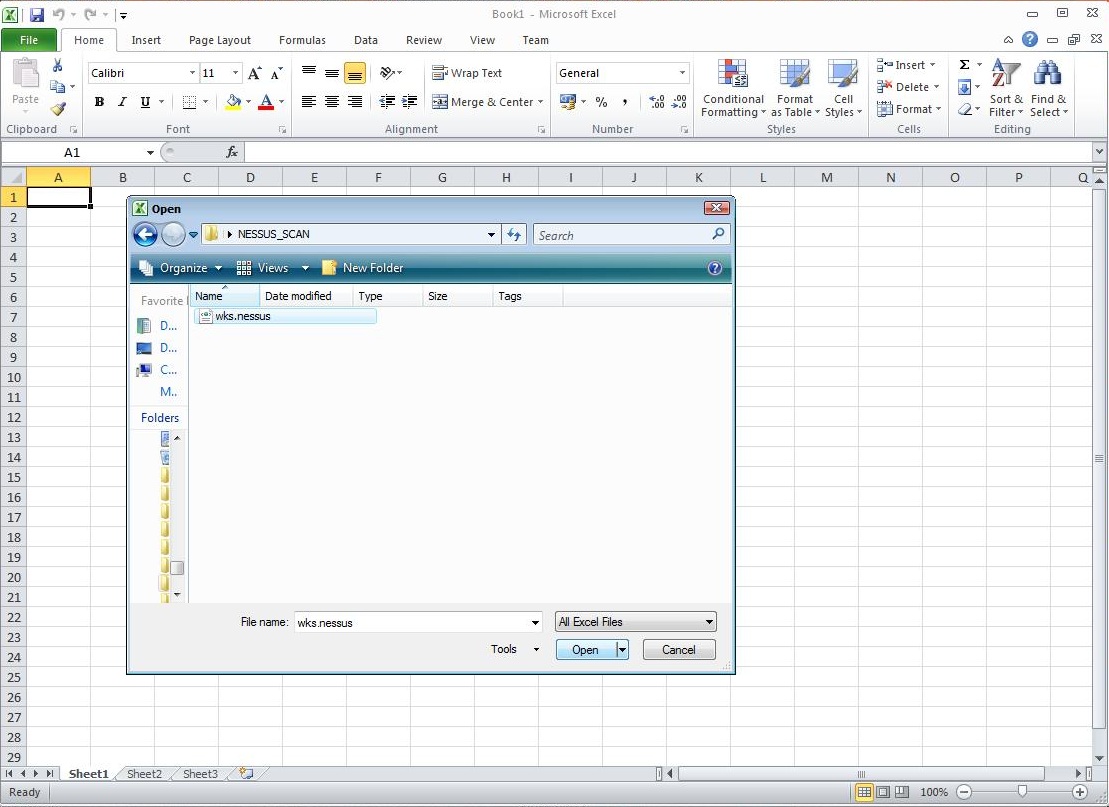
1-     Abrimos Excel -> Fichero -> Abrir y seleccionar  el fichero XML.

1-     Open Excel -> File-> Open and select the XML file. 

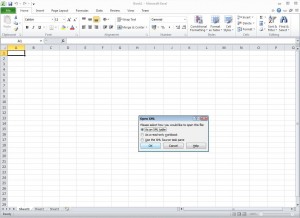
2- Al seleccionar el fichero, Excel nos mostrará una ventana para preguntarnos en qué formato debe abrir el fichero, en nuestro caso seleccionamos la primera opción “como una tabla XML”.

2 – Select the file, Excel will show us a window to ask in which format should open the file and in our case we select the first option “As an XML table”.


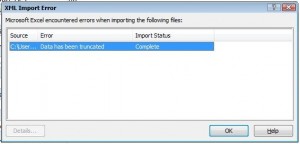
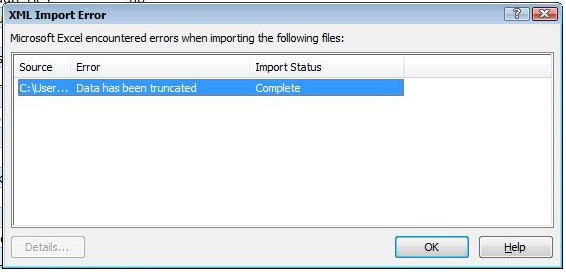
3-Nos dará un error pero no pasa nada, le damos OK :)

3 – Excel will give us an error but no worries, just click OK :)


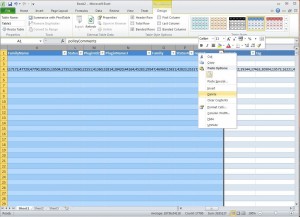
4- Ahora toca hacer limpieza de la tabla generada y esto va en función del gusto de cada uno. Yo suelo quitar las columnas (borrar) desde PolicyName hasta name5 (18 columnas, A-R) ya que no tiene nada de interés.

4- Now it is turn to make some cleaning in the generated table. I usually remove columns (delete) from PolicyName to name5 (18 columns, A-R) because it has nothing of interest to me at least.  


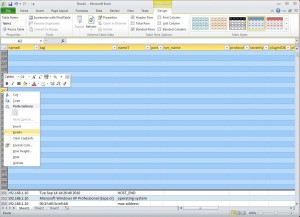
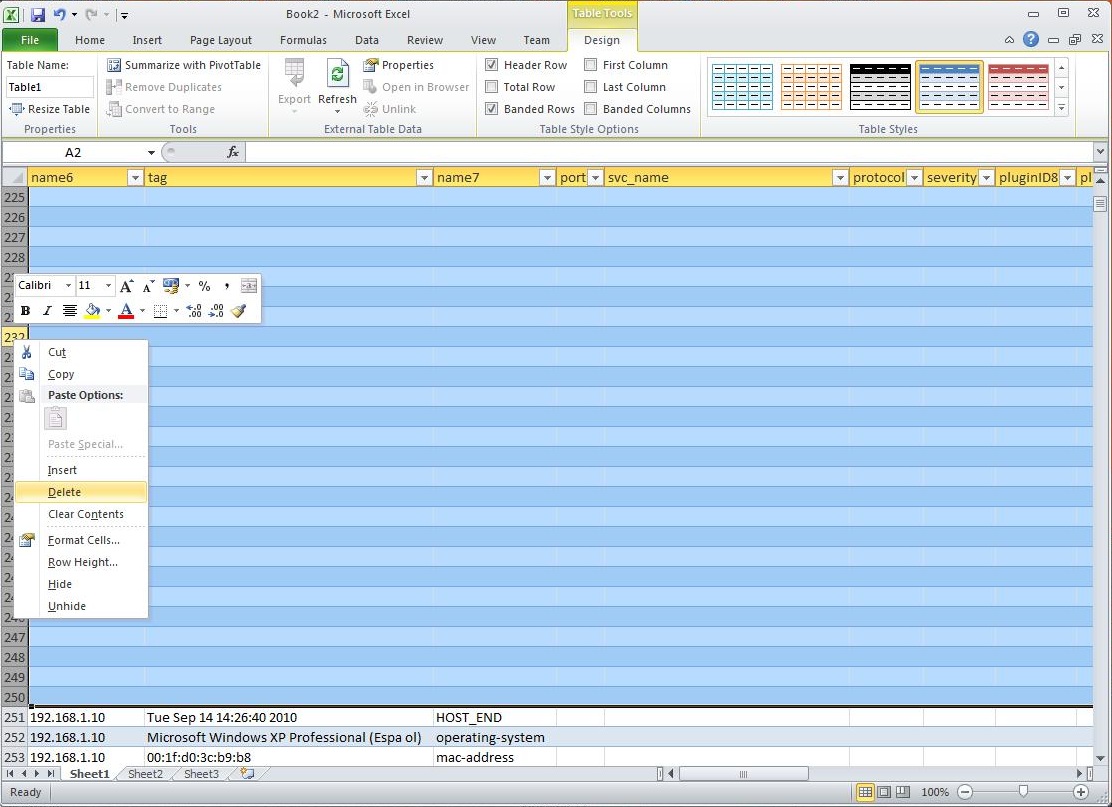
5- A  continuación le toca el turno a las filas, por lo que borro desde la fila 2 hasta la fila 250. Lo que sucede es que todas estas filas se quedan vacías al realizar el paso 4. A partir de la fila  251 viene el resultado de los sistemas escaneados.

5 – Then it is the turn to clean rows for which I delete rows from row 2 to row 250. What happens is that all these rows are empty when you perform step 4. At row 251 starts the result of the scan.


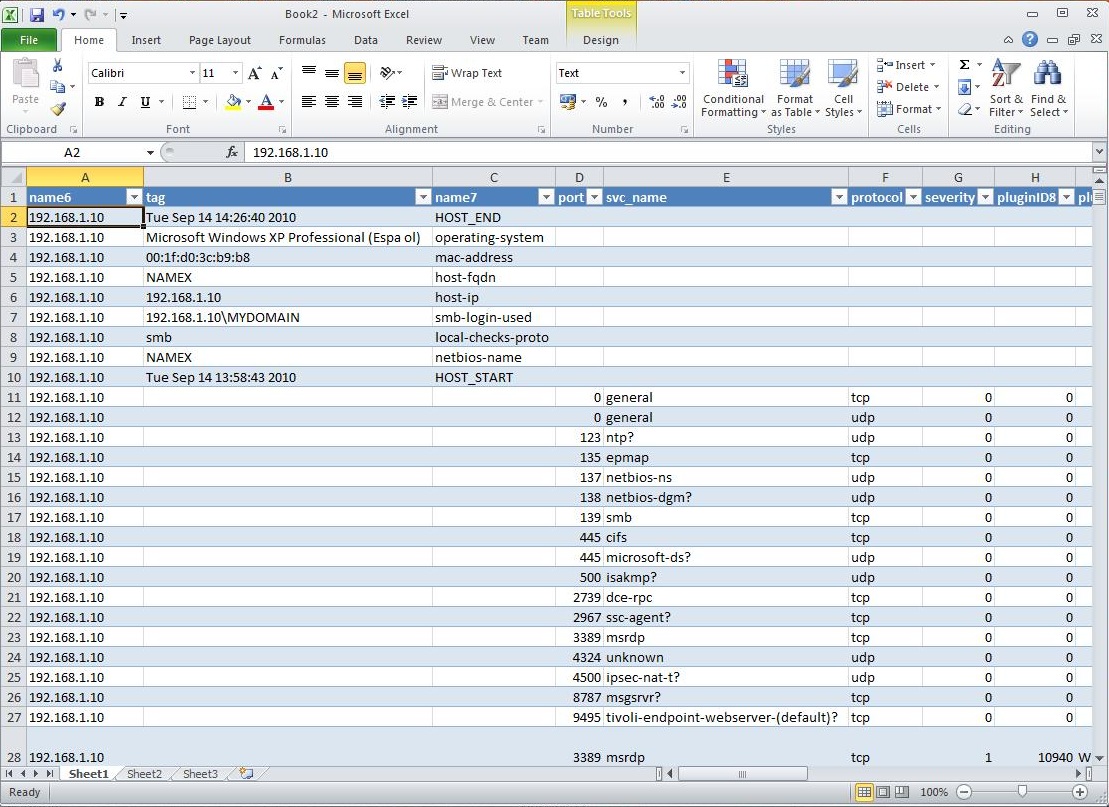
6- Al realizar los pasos 4 y 5 la información del escaneo queda a partir de la columna A, línea 2 y podemos empezar a trabajar en el informe :)

6 – Due to perform steps 4 and 5 now the scan information starts at from column A, row 2 and we can start working on the report :)


Este procedimiento tan simple nos salvara un montón de horas y agilizará la creación de los informes. Excel es una fantástica herramienta para analizar y filtrar información que podemos utilizar para nuestras auditorías.

This simple procedure saves us a lot of hours and speeds up the creation of reports. Excel is a fantastic tool to analyze and filter information that we can use for our audits.

Como he mencionado antes pueden existir otras columnas y filas que seguramente debamos borrar ya que no tienen datos de interés pero eso lo veremos con la práctica. Yo personalmente realizo más pasos que no detallo ;)

Tienes algún truco o herramienta para los informes de nessus?

As I mentioned earlier there may be other columns and rows that we should probably delete because it has no data of interest but we will decide that with practice. I personally do more steps that I’m not detailing ;)

Do you have other tricks or tools for nessus reports?

— Simon Roses Femerling
Posted in Pentest, Security | Tagged , | Leave a comment

Easy Root Android

El otro día navegando por la red encontré una solución simple y elegante para rootear el teléfono Android sin tener que cambiar la rom o cosas raras que se pueden leer en algunos foros. El programa en cuestión se llama SuperOneClick y lo utilicé para rootear mi Nexus One, el mejor teléfono Android del mercado :)

The other surfing the web I found an easy solution for rooting Android phone without having to change the rom or weird things that can be read in some forums. The program in question is called SuperOneClick and I did use it to root my Nexus One, the best Android phone on the market :)

Rootear el teléfono es importante si queremos tener derechos de administrador, Android es un sistema Linux, para poder instalar aplicaciones que necesitan privilegios o cualquier cosa que queramos hacer que ya os iré contado en futuros post ;)

Root the phone is important if we want to have administrator privileges, Android is a Linux system at the end, to install applications that require privileges or anything else that we want to do, more on that on future posts ;)

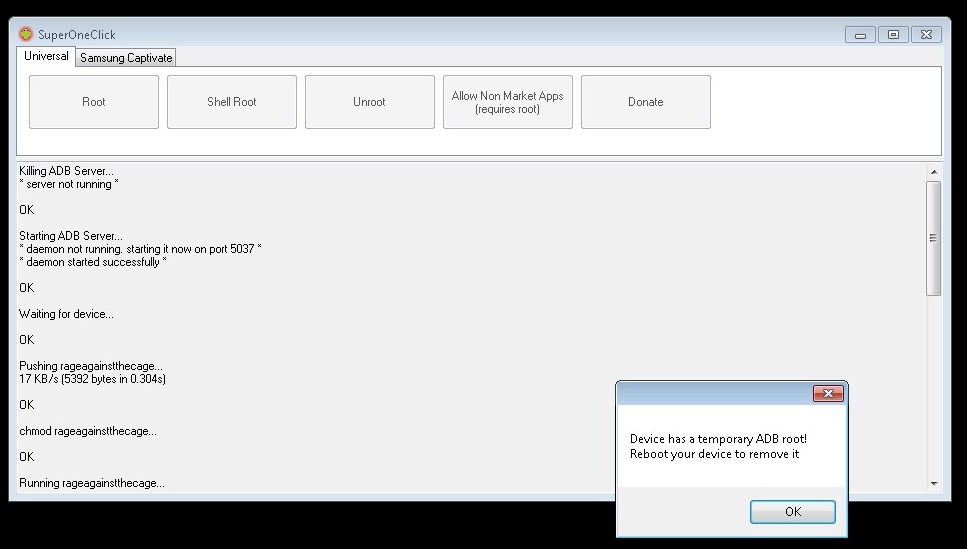
A continuación expongo un screenshot de SuperOneCLick que basta que tengamos conectado el teléfono al ordenador mediante Android SDK, y pulsar el botón Root y pasado unos segundos nuestro teléfono tendrá una nueva aplicación instalada y con permisos de administrador.

Below is a screenshot of SuperOneCLick in action to use it we need to have the phone connected to the computer using the Android SDK, and click Root button and after few seconds our phone will have a new application installed and with administrator permissions.

Otra función interesante es el botón Shell Root que instala una shell con privilegios de administrador de forma temporal para usos más avanzados como extraer aplicaciones del teléfono entre otras cosas.

Another interesting feature is the Root Shell button that installs a temporary shell for more advanced uses like extracting phone internal apps among other things.

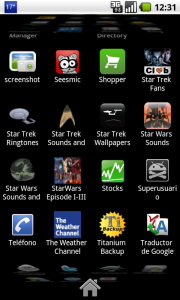
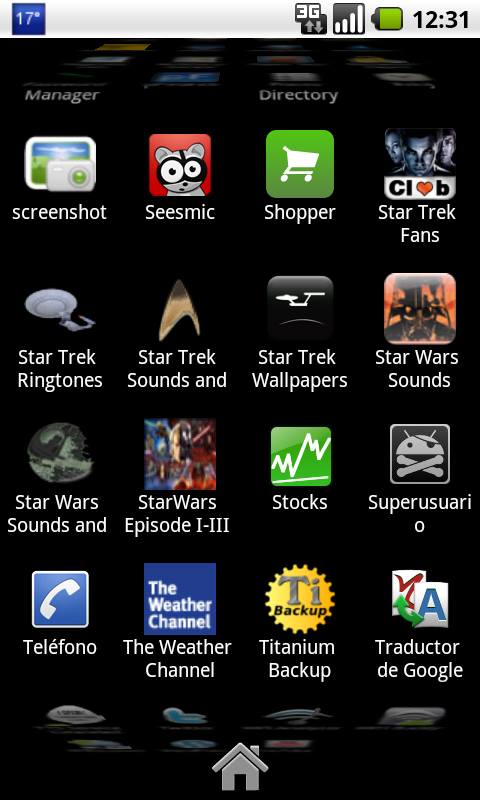
Si el proceso salió bien tendremos un nuevo icono en el desktop del teléfono con el nombre de Superusuario como se puede ver la imagen. Y este screenshot fue tomado con la aplicación “screenshot” que necesita root.

If the process went well we have a new icon on the desktop phone with admin privileges called superuser as you can see in the image. And this screenshot was taken with the “screenshot” application that requires root. 

Vale confieso soy un fan de la ciencia ficción :)

Enlace a SuperOneClick

Alguna otra forma interesante de rootear Android?

Ok I confess I’m a huge fan of science fiction :)

SuperOneClick Link

Do you know another cool way to root Android?

Mas informacion / More Info:

— Simon Roses Femerling
Posted in Technology | Tagged , , | Leave a comment