Last May 10 and 11 the course of Computer Forensic Expert was held in Reus (Spain) by the Asociación Nacional de Tasadores y Peritos Judiciales Informáticos (ANTPJI), which I am member and one of the instructors, where I had the pleasure of giving a talk on two of my passions such as Python and OSINT (Open Source Intelligence).
Python is a great language to quickly develop all kinds of powerful applications with lots of libraries to perform exploits, reverse engineering, web analysis tools and more. No doubt a useful knowledge for any security expert.
Internet is immense, sheltering all unimaginable information and this is the reason why OSINT techniques are vital to collect, analyze and present this information.
For this course, I decided it would be interesting for attendees to learn how to develop simple tools (scripts) that allow them to perform OSINT using Python with a series of practical exercises with a specific objective each.
Presentation and code are available at VULNEX website.
Note: I have removed from the scripts the Google Hacking query, so the reader can insert its own query.
Tool #1
Objective: search ANTPJI members on LinkedIn using Google Custom Search API.
These scripts are very simple and do the same thing but in a different way. The first one uses the Google API Client, while the second uses the fantastic Requests library.
In these scripts we are using some Google Hacking to find members of the association on LinkedIn.
# File: ex1_a.py
# Date: 05/14/13
# Author: Simon Roses Femerling
# Desc: Basic Google Hacking
#
# VULNEX (C) 2013
# www.vulnex.com

import const
from apiclient.discovery import build
import pprint

# your google hacking query
query=''
query_params=''

doquery=query+query_params

service = build("customsearch","v1",developerKey=const.cse_token)

res = service.cse().list(
    q=doquery,
    cx=const.cse_id,
    num=10).execute()

pprint.pprint(res)

# VULNEX EOF
# File: ex1_b.py
# Date: 05/14/13
# Author: Simon Roses Femerling
# Desc: Simple Google Hacking
#
# VULNEX (C) 2013
# www.vulnex.com

import requests
import json
import urllib
import const

site="https://www.googleapis.com/customsearch/v1?key="

# Your Google Hacking query
query=''
query_params=''

url=site+const.cse_token+"&cx="+const.cse_id+"&q=" + urllib.quote(query+query_params)
response = requests.get(url)
print json.dumps(response.json,indent=4)

# VULNEX EOF
When running any of these scripts, we get the following result:

Not too interesting for the moment :)
Tool #2
Objective: obtain photos of the ANTPJI members LinkedIn profiles using Google Custom Search API.
The following script gets the photos of the members of the association on LinkedIn and also extracts picture metadata ;) The script generates an HTML page with all the photos.
Used libraries: Google API Client, PIL, Requests and Markup.
# File: ex2.py
# Date: 05/14/13
# Author: Simon Roses Femerling
# Desc: Download picture and extract metadata
#
# VULNEX (C) 2013
# www.vulnex.com

import const
from apiclient.discovery import build
import pprint
import os
from PIL import Image
from StringIO import StringIO
from PIL.ExifTags import TAGS
import requests
import markup

def do_query(istart=0):
    if istart == 0:
        res = service.cse().list(
        q=doquery,
        cx=const.cse_id,
        num=10).execute()
    else:
        res = service.cse().list(
        q=doquery,
        cx=const.cse_id,
        num=10,
        start=istart).execute()
    return res

pic_id=1
do_stop=10
cnt=1

page=markup.page()

# Set page title
page.init(title="ANTPJI OSINT")
page.h1("ANTPJI OSINT")

# Set output directory
out_dir = "pics_gepl"

# Your Google Hacking query
query=''
query_params=''

doquery=query+query_params

service = build("customsearch","v1",developerKey=const.cse_token)

if not os.path.exists(out_dir):
    os.makedirs(out_dir)

res=[]
while True:
    if cnt==1:
        res = do_query()
    else:
        if not res['queries'].has_key("nextPage"): break
        res = do_query(res['queries']['nextPage'][0]['startIndex'])
    cnt+=1
    if cnt > do_stop: break
    if res.has_key("items"):
        for item in res['items']:
            name=""
            if not item.has_key('pagemap'): continue
            if not item['pagemap'].has_key('hcard'): continue
            hcard = item['pagemap']['hcard']
            for card in hcard:
                pic_url=""
                if 'title' in card:
                    if 'fn' in card: name = card['fn']
                    if 'photo' in card: pic_url = card['photo']
                if pic_url != "":
                    image = requests.get(pic_url)
                    pic_n = os.path.join(out_dir,"%s.jpg") % pic_id
                    file = open(pic_n,"w")
                    pic_id+=1
                    try:
                        i = Image.open(StringIO(image.content))
                        if hasattr(i,"_getexif"):
                            ret = {}
                            info = i._getexif()
                            if info:
                                for k,v in info.items():
                                    decode = TAGS.get(k,v)
                                    ret[decode] = v
                                print ret
                        i.save(file,"JPEG")
                        page.p(name.encode('ascii','ignore'))
                        page.img(src=pic_n)
                        page.br()
                        page.br()
                    except IOError, e:
                        print "error: %s" % e
                    file.close()

# Set your output filename
with open('index_gepl.html','w') as fp:
    fp.write(str(page))

# VULNEX EOF
And this is the result:
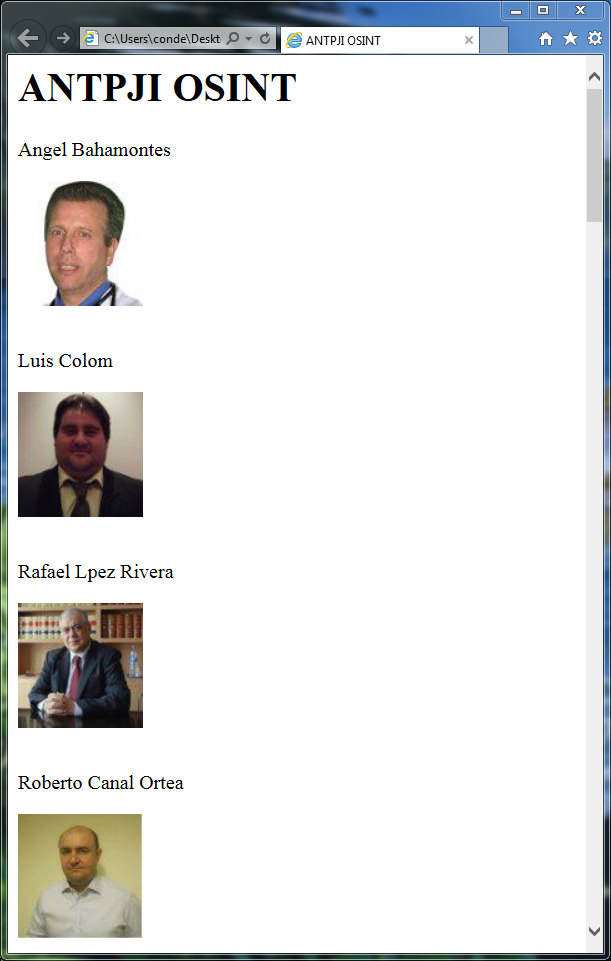
With few lines of code we have got a very interesting tool.
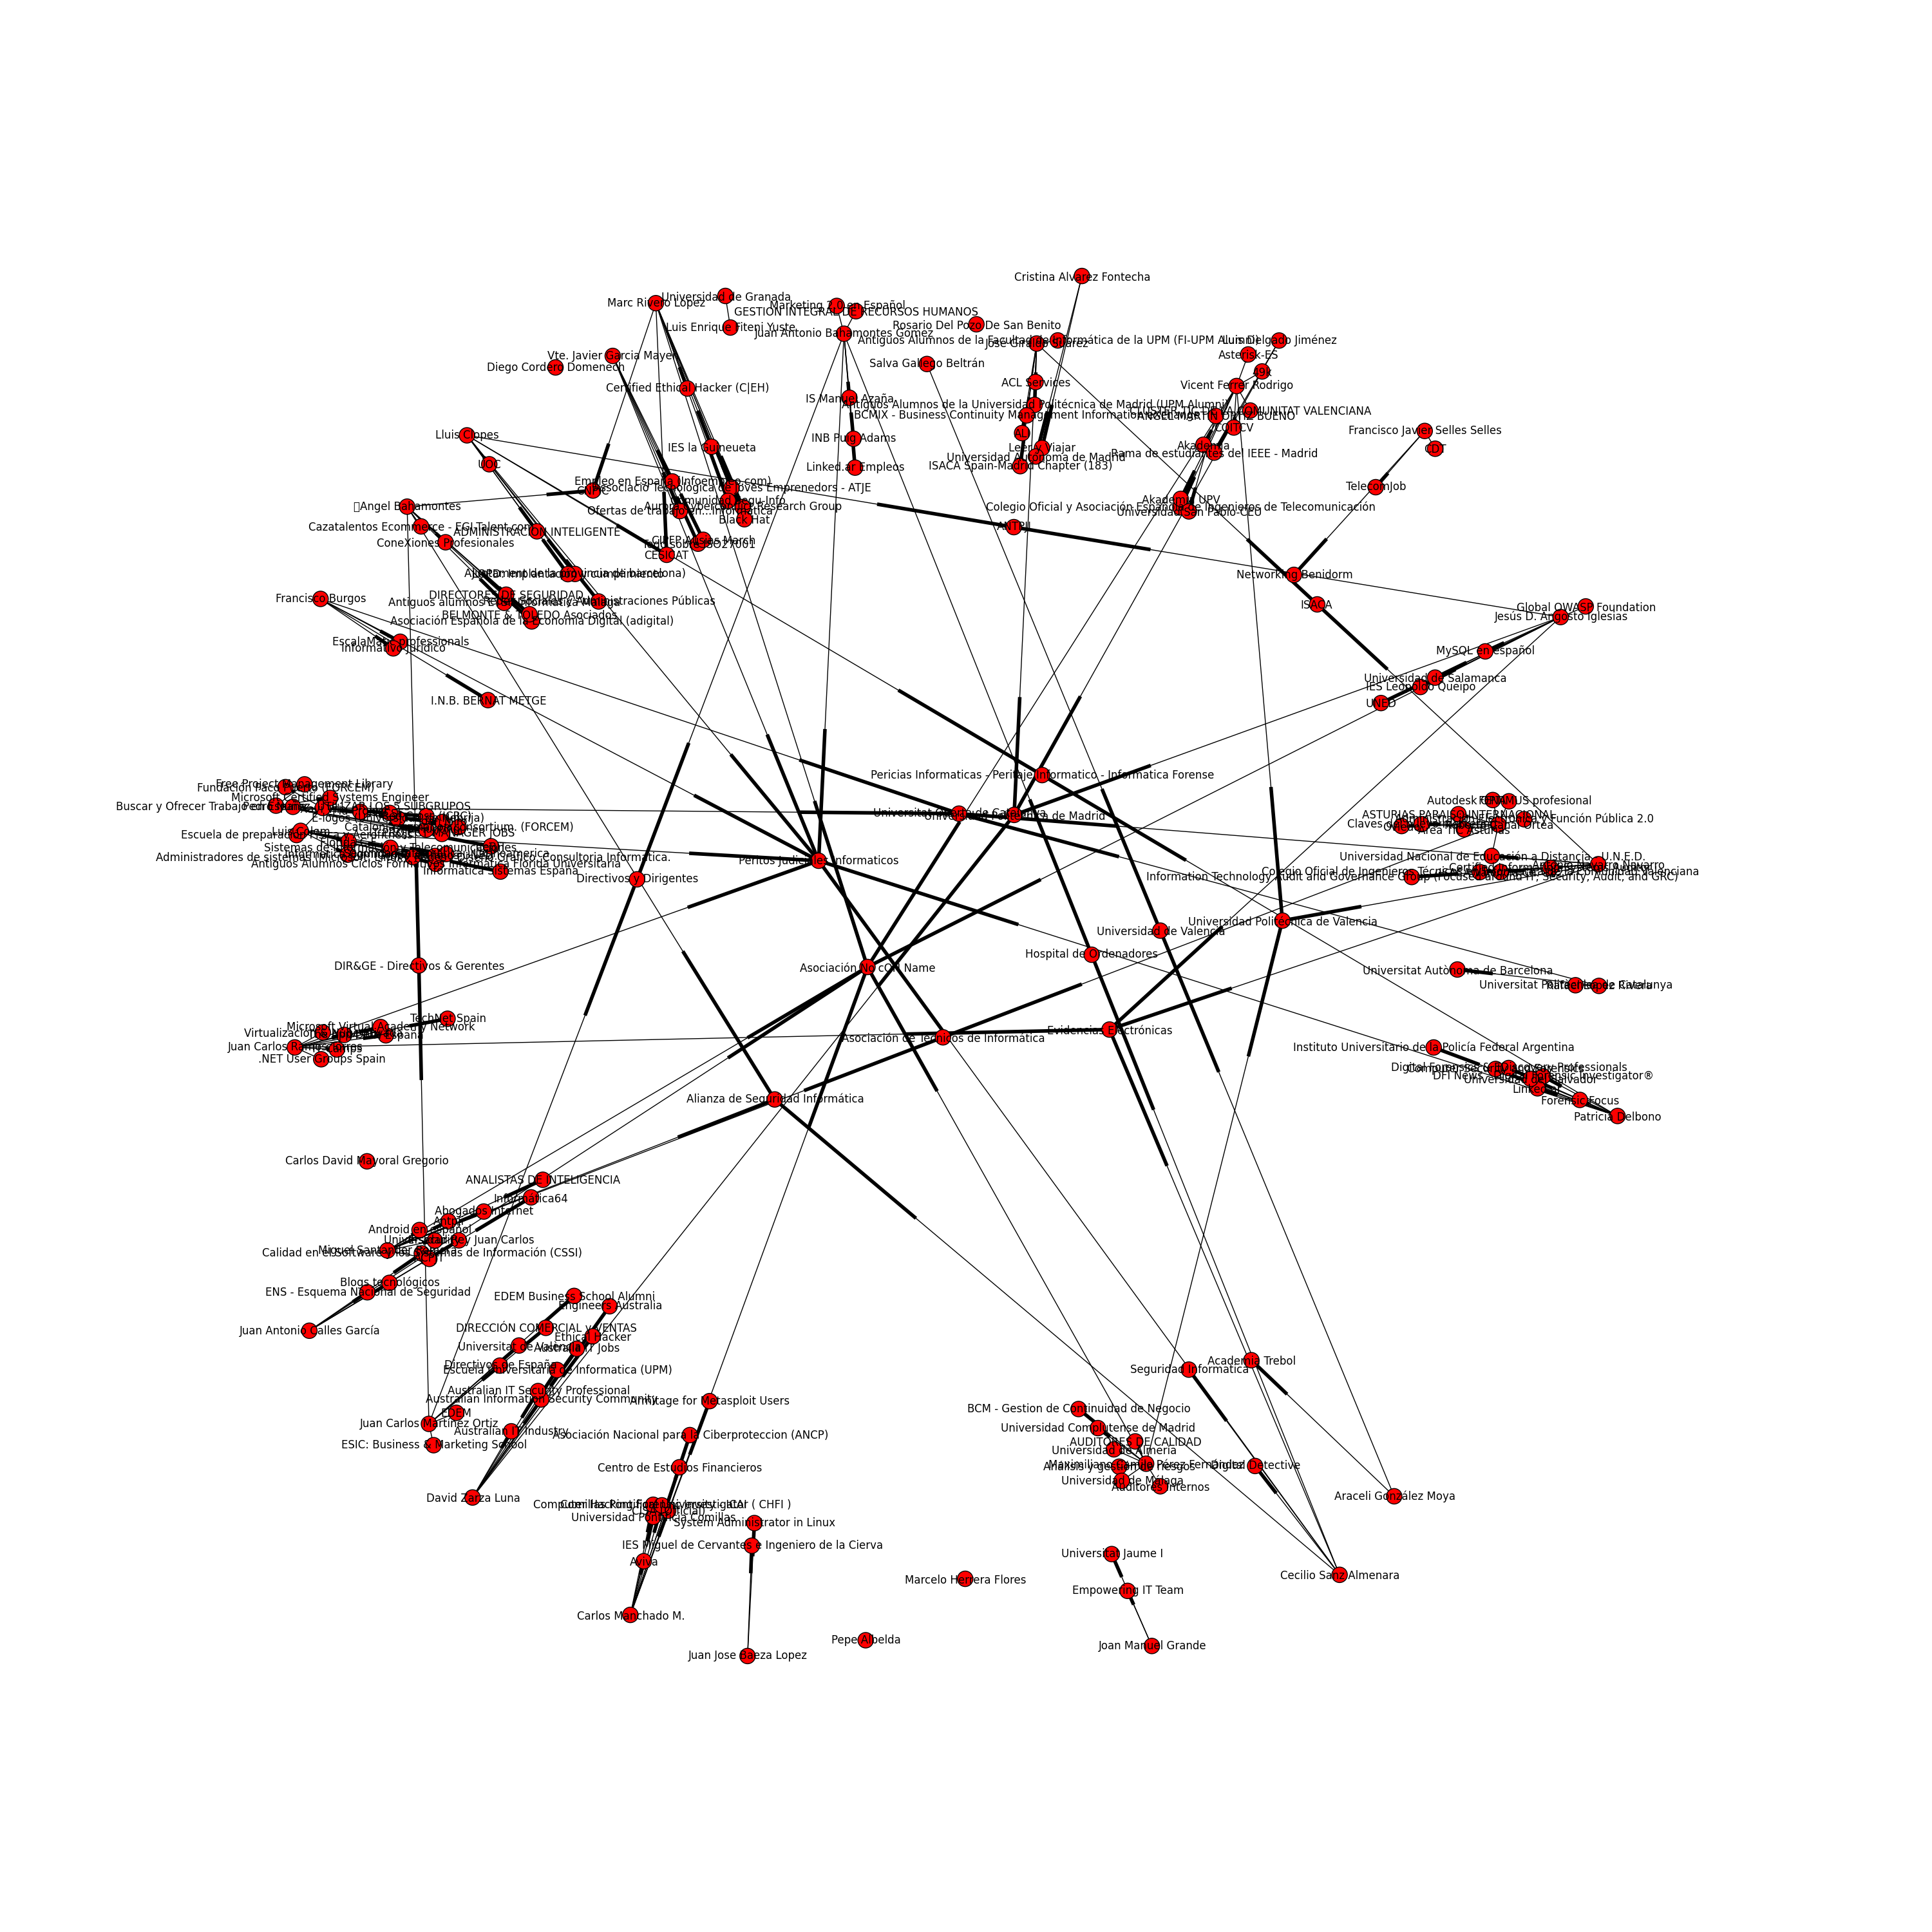
Tool #3
Objective: what is the relationship of ANTPJI members on LinkedIn?
With this script we are looking for the relationship between the members of the association at LinkedIn and create a graph that relates the words.
Used libraries: Google API Client, NetworkX and Matplotlib.
# File: ex3.py
# Date: 05/14/13
# Author: Simon Roses Femerling
# Desc: Build graph from profiles
#
# VULNEX (C) 2013
# www.vulnex.com

import const
from apiclient.discovery import build
import networkx as nx
import matplotlib.pyplot as plt

def do_query(istart=0):
    if istart == 0:
        res = service.cse().list(
        q=doquery,
        cx=const.cse_id,
        num=10).execute()
    else:
        res = service.cse().list(
        q=doquery,
        cx=const.cse_id,
        num=10,
        start=istart).execute()
    return res

do_stop=10
cnt=1

# Your Google Hacking query here
query=''
query_params=''

doquery=query+query_params

service = build("customsearch","v1",developerKey=const.cse_token)

G=nx.DiGraph()
res=[]
while True:
    if cnt==1:
        res = do_query()
    else:
        if not res['queries'].has_key("nextPage"): break
        res = do_query(res['queries']['nextPage'][0]['startIndex'])
    cnt+=1
    if cnt > do_stop: break
    if res.has_key("items"):
        for item in res['items']:
            name=""
            if not item.has_key('pagemap'): continue
            if not item['pagemap'].has_key('hcard'): continue
            hcard = item['pagemap']['hcard']
            for card in hcard:
                if 'title' in card:
                    if 'fn' in card: name = card['fn']
                G.add_edge(name,card["fn"])

plt.figure(figsize=(30,30))
nx.draw(G)
# Set your output filename
plt.savefig('antpji_rela_map.png')

# VULNEX EOF
And this is the graph generated:
Tool #4
Objective: what’s hot on Twitter account of the association?
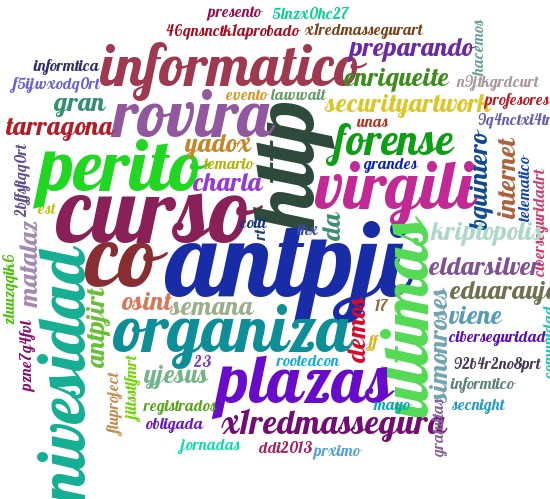
This script downloads the latest tweets from the account of the association and generates a tag cloud. Useful to quickly view what are they talking about.
Used libraries: Requests, pytagcloud.
# File: ex4.py
# Date: 05/14/13
# Author: Simon Roses Femerling
# Desc: Create word cloud
#
# VULNEX (C) 2013
# www.vulnex.com

import requests
import json
import urllib
import const

from pytagcloud import create_tag_image, make_tags
from pytagcloud.lang.counter import get_tag_counts

site="http://search.twitter.com/search.json?q="

# Your query here
query=""

url=site+urllib.quote(query)

response = requests.get(url)

tag = []
for res in response.json["results"]:
    tag.append(res["text"].encode('ascii','ignore'))

text = "%s" % "".join(tag)
tags = make_tags(get_tag_counts(text),maxsize=100)
# Set your output filename
create_tag_image(tags,"antpji_word_cloud.png", size=(600,500), fontname="Lobster")

# VULNEX EOF
And this is the tag cloud:
Tool #5
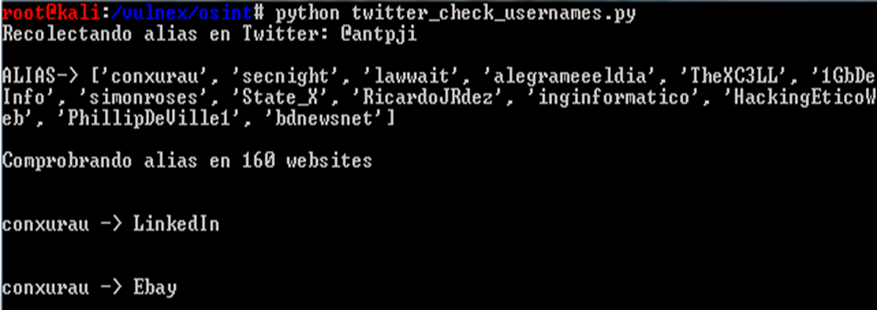
Objective: do the ANTPJI usernames from Twitter exist on social networks sites?
The following script extracts the usernames that have been published or mentioned in the Twitter of the association and checks in 160 social networks sites.
Used libraries: Requests.
# File: ex5.py
# Date: 05/14/13
# Author: Simon Roses Femerling
# Desc: Check usernames on 160 social network sites
#
# VULNEX (C) 2013
# www.vulnex.com

import requests
import json
import urllib
import const
import pprint

site="http://search.twitter.com/search.json?q="

# Your query here
query=""

url=site+urllib.quote(query)

print "Recolectando alias en Twitter: %s\n" % query
response = requests.get(url)

users = []

for res in response.json["results"]:
    if res.has_key('to_user'):
        if not res['to_user'] in users: users.append(str(res["to_user"]))
    if res.has_key('from_user'):
        if not res['from_user'] in users: users.append(str(res["from_user"]))

print "ALIAS-> %s" % users

print "\nComprobrando alias en 160 websites\n"
for username in users:
    for service in const.services:
            try:
            res1 = requests.get('http://checkusernames.com/usercheckv2.php?target=' + service + '&username=' + username, headers={'X-Requested-With': 'XMLHttpRequest'}).text
            if 'notavailable' in res1:
                print ""
                print username + " -> " + service
                print ""
            except Exception as e:
                print e

# VULNEX EOF
And the result is as follows:
Tool #6
Objective: can we extract metadata from ANTPJI photos?
This script downloads the photos related to ANTPJI from Google and extracts the metadata.
Used libraries: Requests, PIL and Markup.
# File: ex6.py
# Date: 05/14/13
# Author: Simon Roses Femerling
# Desc: Download pictures from Google and extract metadata
#
# VULNEX (C) 2013
# www.vulnex.com

import const
from apiclient.discovery import build
import pprint
import os
from PIL import Image
from StringIO import StringIO
from PIL.ExifTags import TAGS
import requests
import markup

def do_query(istart=0):
    if istart == 0:
        res = service.cse().list(
        q=doquery,
        cx=const.cse_id,
        num=10).execute()
    else:
        res = service.cse().list(
        q=doquery,
        cx=const.cse_id,
        num=10,
        start=istart).execute()
    return res

pic_id=1
do_stop=10
cnt=1

page=markup.page()
# Set your page title
page.init(title="ANTPJI OSINT")
page.h1("ANTPJI OSINT")

# Set output directory
out_dir = "pics_gepl"

# Define your Google hacking query here
query=''
query_params=''

doquery=query+query_params

service = build("customsearch","v1",developerKey=const.cse_token)

if not os.path.exists(out_dir):
    os.makedirs(out_dir)

res=[]
while True:
    if cnt==1:
        res = do_query()
    else:
        if not res['queries'].has_key("nextPage"): break
        res = do_query(res['queries']['nextPage'][0]['startIndex'])
    cnt+=1
    if cnt > do_stop: break
    if res.has_key("items"):
        for item in res['items']:
            name=""
            if not item.has_key('pagemap'): continue
            if not item['pagemap'].has_key('hcard'): continue
            hcard = item['pagemap']['hcard']
            for card in hcard:
                pic_url=""
                if 'title' in card:
                    if 'fn' in card: name = card['fn']
                    if 'photo' in card: pic_url = card['photo']
                if pic_url != "":
                    image = requests.get(pic_url)
                    pic_n = os.path.join(out_dir,"%s.jpg") % pic_id
                    file = open(pic_n,"w")
                    pic_id+=1
                    try:
                        i = Image.open(StringIO(image.content))
                        if hasattr(i,"_getexif"):
                            ret = {}
                            info = i._getexif()
                            if info:
                                for k,v in info.items():
                                    decode = TAGS.get(k,v)
                                    ret[decode] = v
                                print ret
                        i.save(file,"JPEG")
                        page.p(name.encode('ascii','ignore'))
                        page.img(src=pic_n)
                        page.br()
                        page.br()
                    except IOError, e:
                        print "error: %s" % e
                    file.close()

# Set your output filename
with open('index_gepl.html','w') as fp:
    fp.write(str(page))

# VULNEX EOF
A picture is worth a thousand words!

As we have seen throughout this article we can easily write sophisticated OSINT tools with a little bit of Python that allows us to gather lots of information about individuals or collectives.
If you would like me to go into any topic in Python and OSINT in depth let me know :)
What tools do you use for OSINT?
— Simon Roses Femerling
References
- Thanks to the people at RaiderSec in which I have based my script code. Automated Open Source Intelligence (OSINT) Using APIs
- NSA – Untangling the Web: A Guide to Internet Research
- NATO OSINT Handbook