Nessus 4.2 Visual Tutorial

Como muchos ya sabréis Tenable Network Security ha lanzado la nueva versión de Nessus 4.2, un potente scanner de vulnerabilidades con las siguientes mejoras:

  • La instalación en Windows es más sencilla.
  • El cliente es una aplicación basada en flash que comunica con el Nessus servidor Web y es totalmente intuitiva.
  • Mejora del rendimiento del scanner, mayor velocidad y estabilidad.
  • Más de 33000 plugins para todo tipo de vulnerabilidades (Windows, Linux, Web, etc.)
  • Los informes son mucho más cómodos de leer. (Truco: Excel 2007 lee sin problemas el formato .nessus basado en XML que facilita el parsing 🙂

Os dejo el tutorial visual para hacer un escaneo a un equipo WinXP con la nueva versión de Nessus 🙂

As you may already know Tenable Network Security has released the new version of Nessus 4.2, a powerful vulnerability scanner, with noticeable improvements such as:

  • Installing Nessus on Windows is simpler.
  • The client is a flash app that communicates with the Nessus Web Server and is totally intuitive.
  • Improved performance of the scanner with greater speed and stability.
  • More than 33000 plugins for all kinds of vulnerabilities (Windows, Linux, Web, etc.)
  • Reports are much more comfortable to read. (Trick: Excel 2007 reads smoothly the .nessus XML-based format for easy parsing 🙂

Let’s run a scan of a WinXP machine with the new version of Nessus through the following visual tutorial 🙂

1)

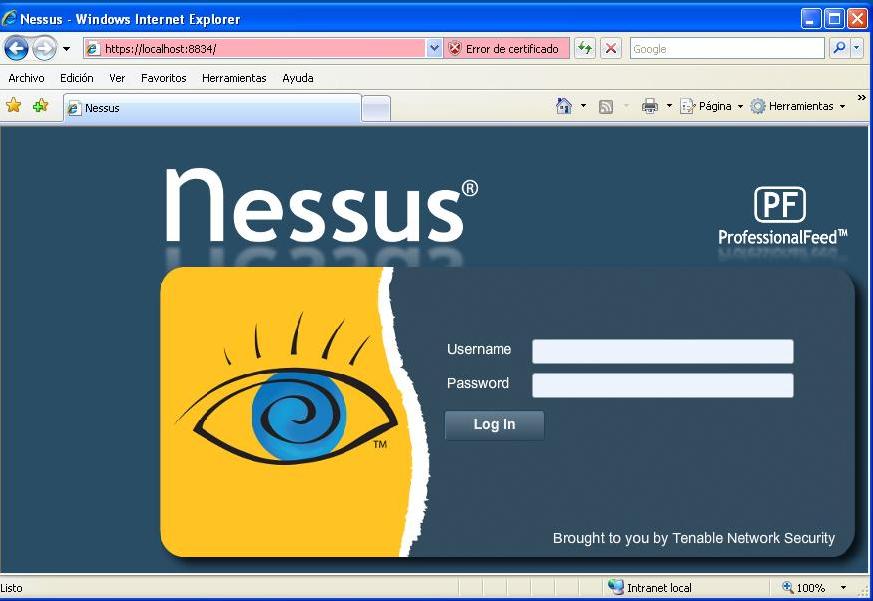
Realizar un login con la cuenta que hayamos creado. Nota: El navegador nos dará un aviso de seguridad sobre certificado pero podemos continuar.

Let’s login with the account we created. Note: The browser will warning us about the certificate but we can continue.
 nessus1

2)

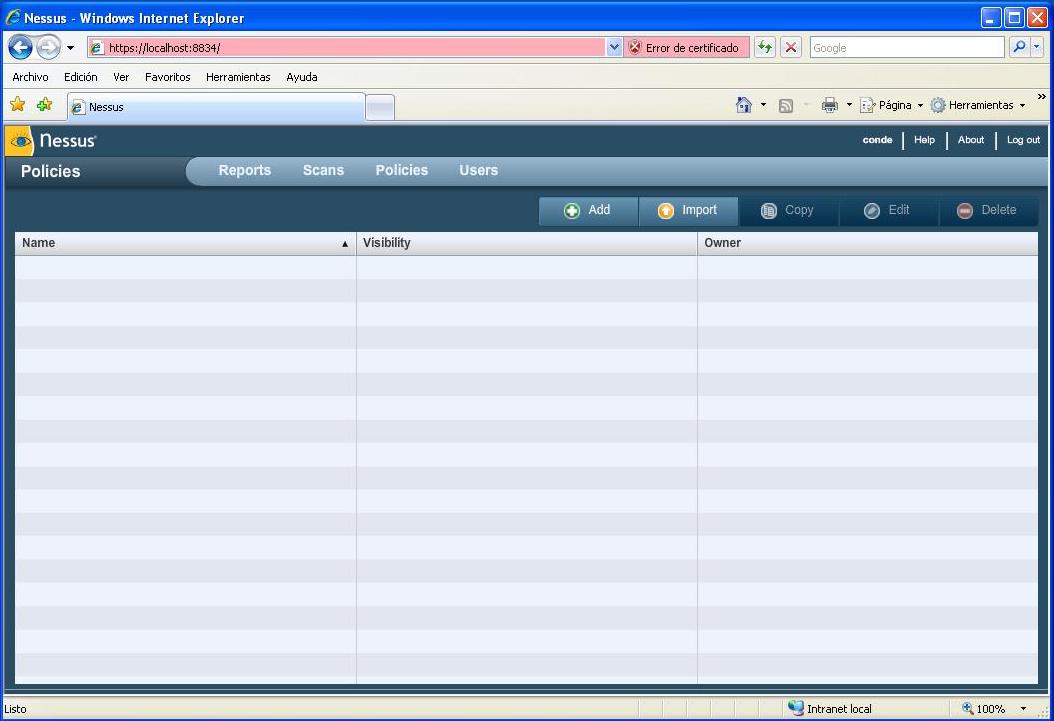
Creamos una política de escaneo. (Policies -> Add)

Let’s create scan policy. (Policies -> Add)
nessus2

3)

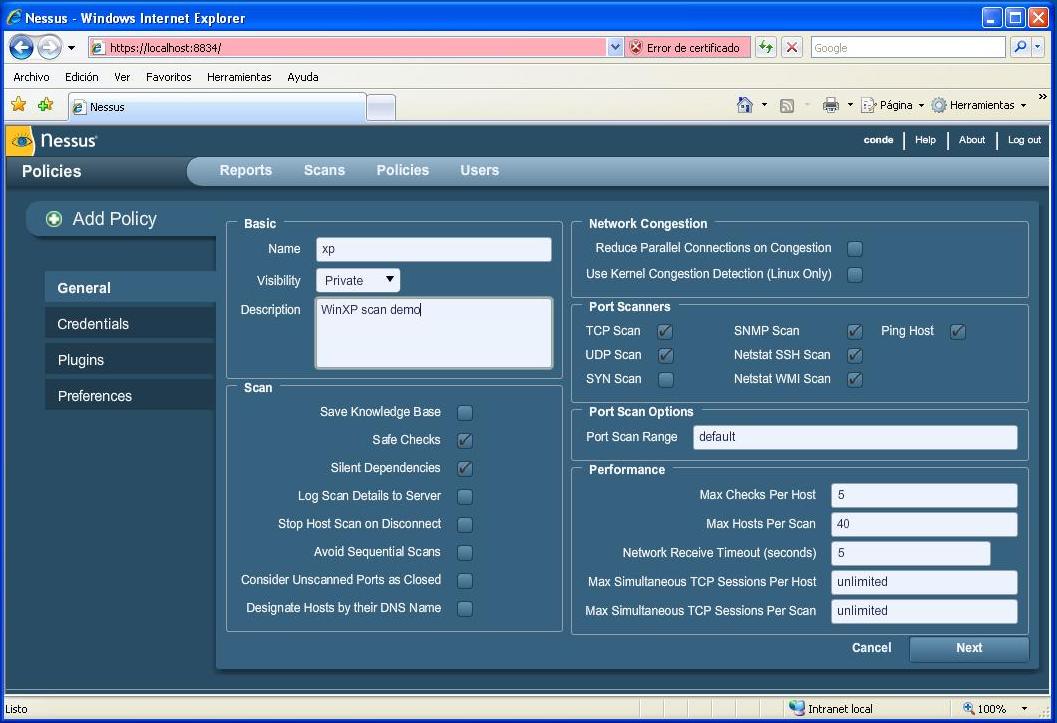
Rellenamos el nombre de la política y las opciones que nos interesen. “Safe Checks” impide que se ejecuten aquellos ataques peligrosos para el sistema ideal para escaneos en servidores. Si nos ponemos encima de cualquier opción con el puntero del ratón nos saldrá una ventana de información sobre qué hace la opción.

Fill the policy name and options that interest us. “Safe Checks” prevents running those attacks that pose danger to the system ideal for server scans. If we hover on top of any option with the mouse pointer an information window will show up regarding what that option does.
nessus3

4)

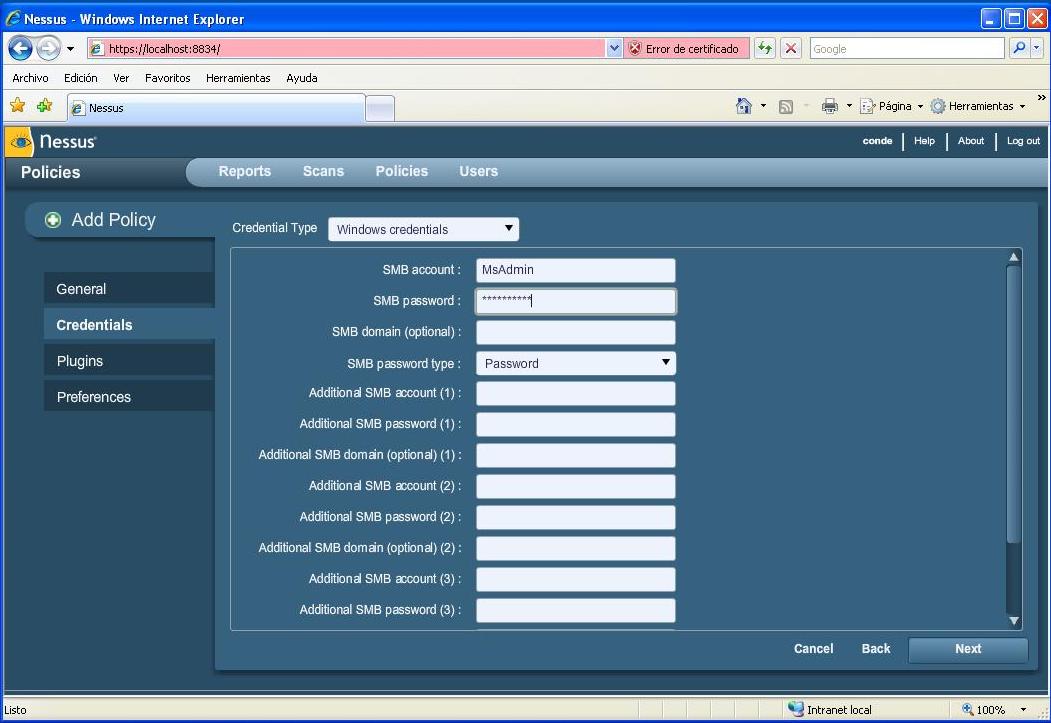
En el siguiente apartado introducimos las credenciales. En mi caso he metido una cuenta administrador Windows para ejecutar escaneos locales a través de SMB. Igualmente podemos meter credenciales para otros protocolos como SSH, base de datos, Telnet, etc.

In the following section we introduce credentials. In my case I got a windows administrator account to run local scans over SMB. We can also set credentials for other protocols such as SSH, databases, Telnet, etc.
nessus4

5)

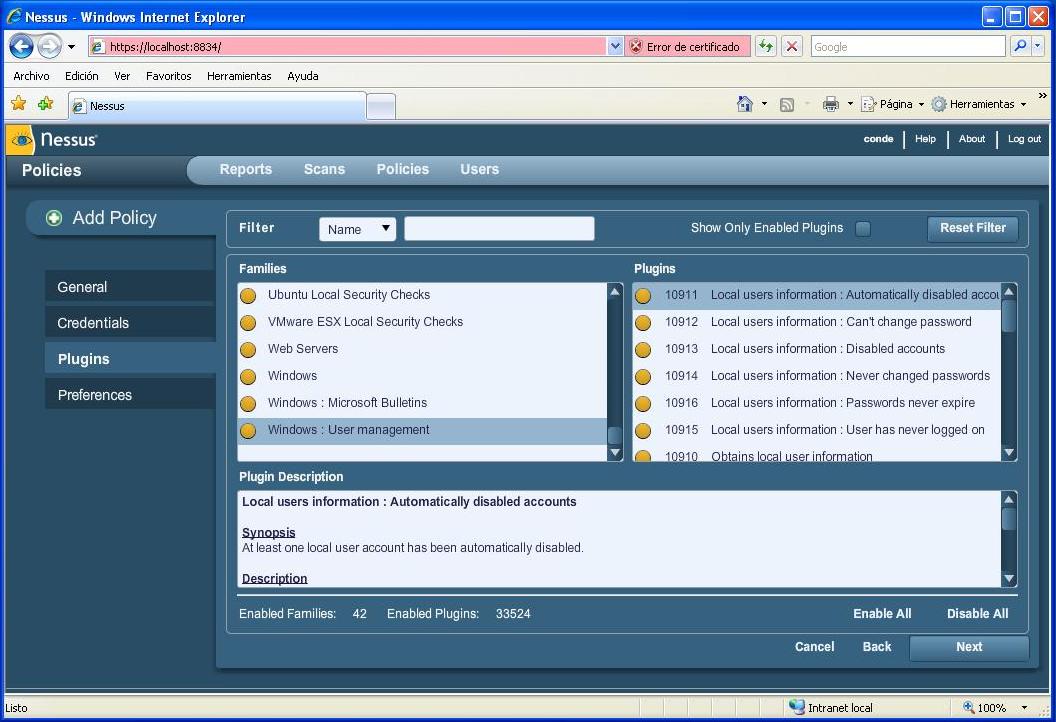
Seleccionamos los plugins que nos interesan aunque podemos dejar todos activados, ya que Nessus es lo suficiente inteligente para ejecutar aquellos que apliquen al sistema.

Select those plugins that interest us but we can enable all since Nessus is sufficiently intelligent to run those which apply to the system only.
nessus5

6)

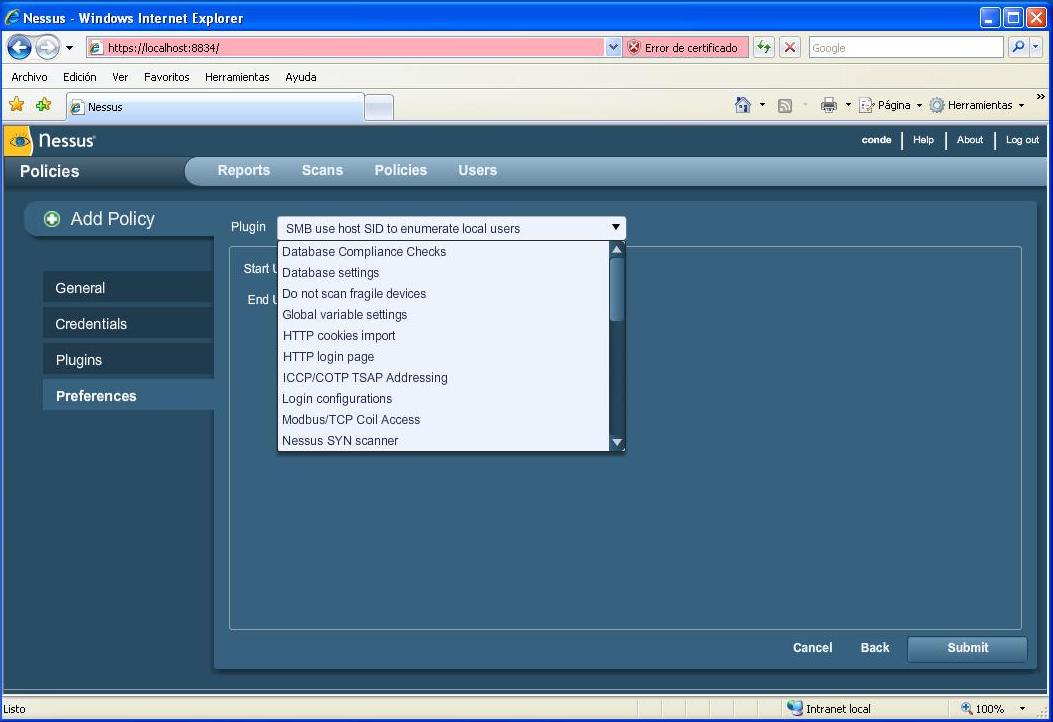
A continuación podemos configurar multitud de parámetros del escaneo como HTTP, Windows, Web, etc. para hacerlo más efectivo. Esto requiere un conocimiento avanzado para conseguir máxima efectividad.

We can then configure the scan parameters such as HTTP, Windows, Web, etc. to make the scanning more effective. This requires advanced knowledge to maximize the benefits.
nessus6

7)

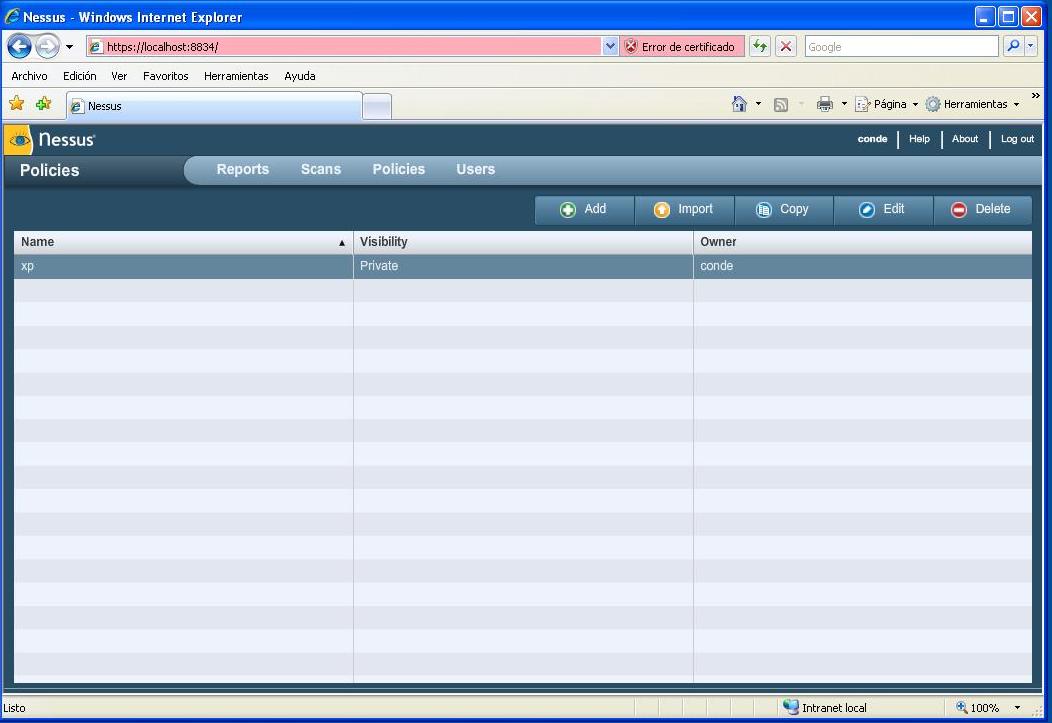
Ahora ya tenemos una política de escaneo lista y podemos empezar el escaneo pinchando en Scans.

Now we have our policy scan ready and we can begin scanning by clicking on Scans.
nessus7

8)

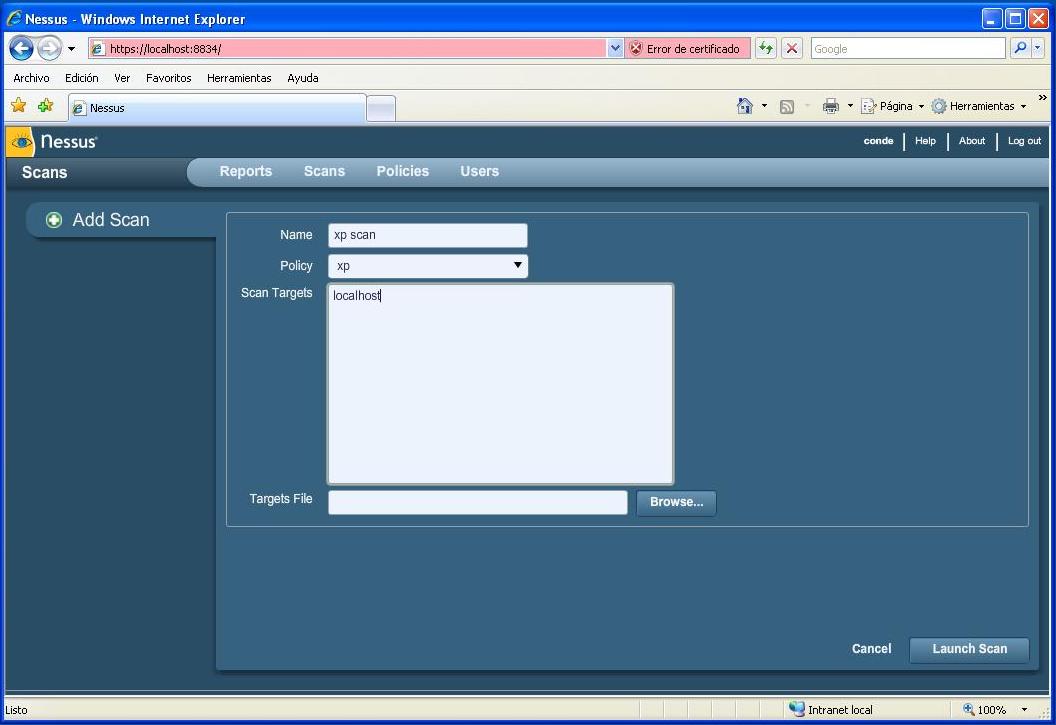
Rellenamos el nombre del escaneo, seleccionamos la política de escaneo en nuestro caso “xp” y los sistemas. Para los sistemas podemos meter directamente los nombres o IPs de las máquinas o leerlos desde un fichero en formato texto mediante la opción “Target File”. Una vez listos pinchamos en Launch Scan.

Fill the name of the scan and select the scan policy in our case “xp”. For entering systems we can directly write the names or IPs of the machines or read them from a file in text format using the “Target File” option. Once ready click on Launch Scan.
nessus8

9)

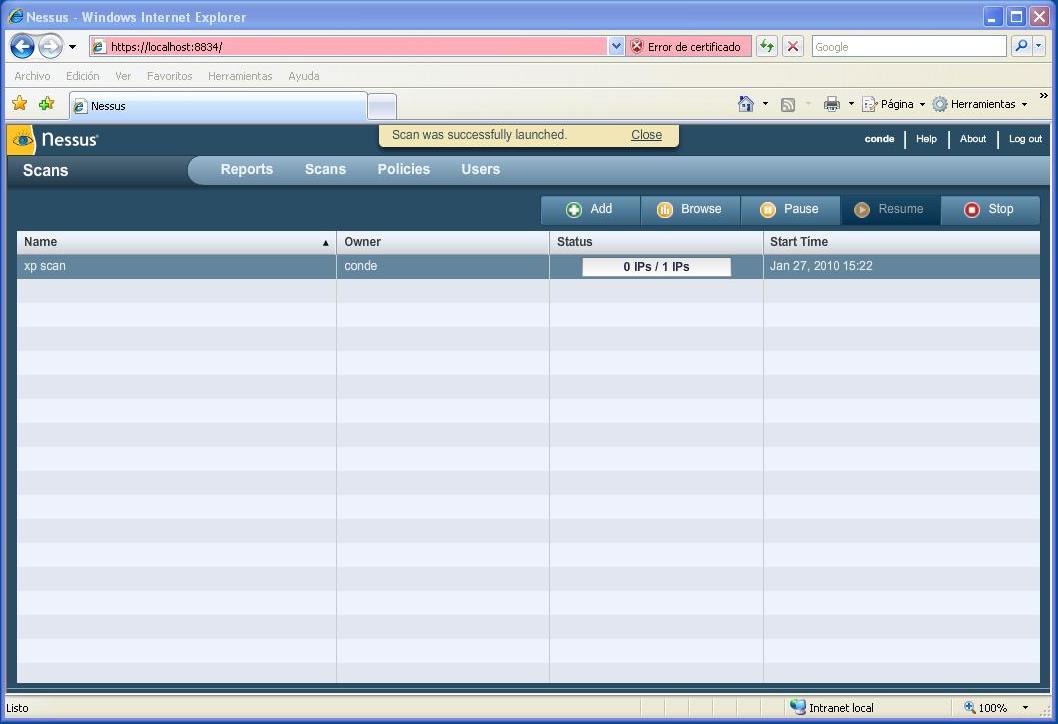
El escaneo ha comenzado y ahora a esperar 🙂

The scan has begun and now we have to wait 🙂
nessus9

10)

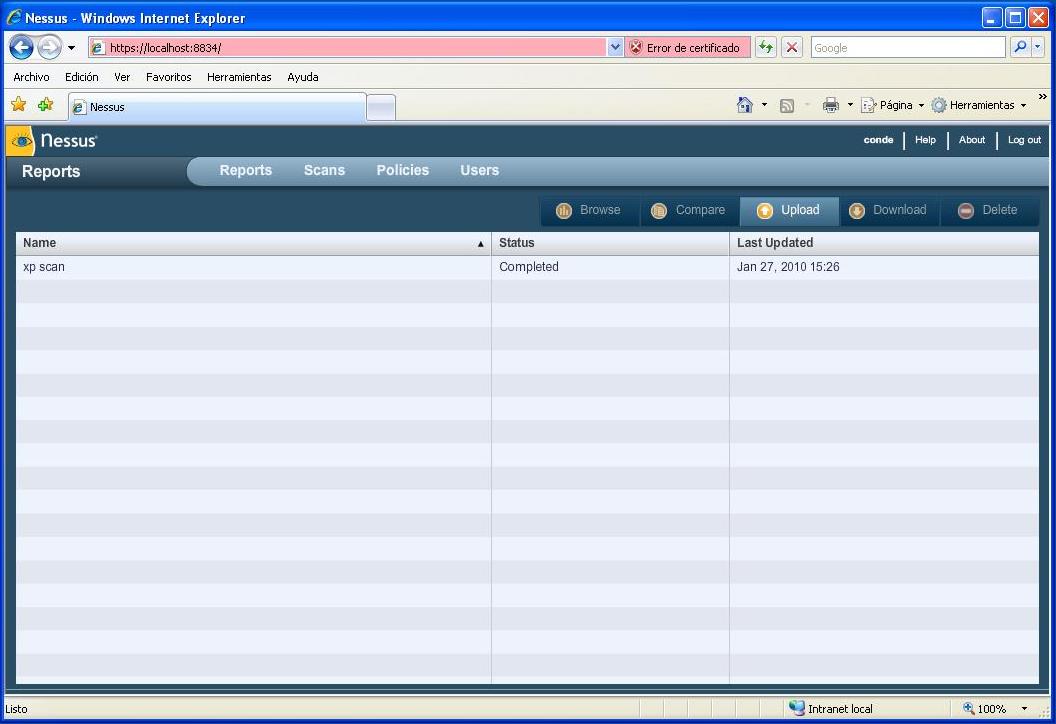
El escaneo ha terminado en 4 minutos porque la máquina era local, y podemos ver los resultados pinchando en Reports.

 The scan has finished in 4 minutes, was localhost, and we can see the results by going to Reports.
nessus10

11)

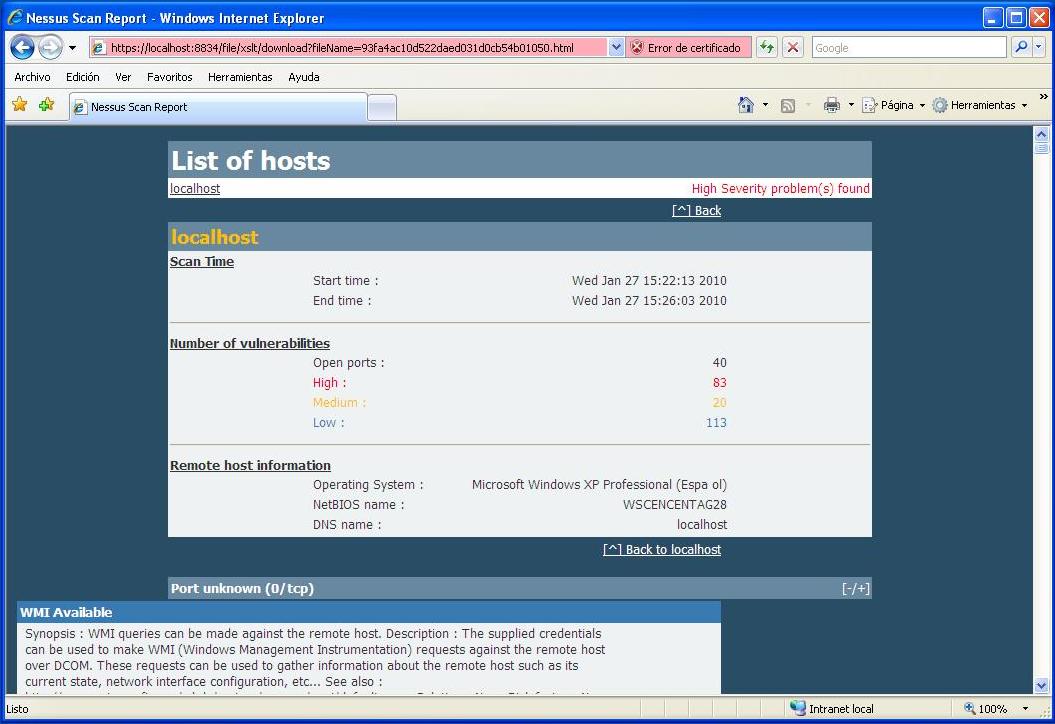
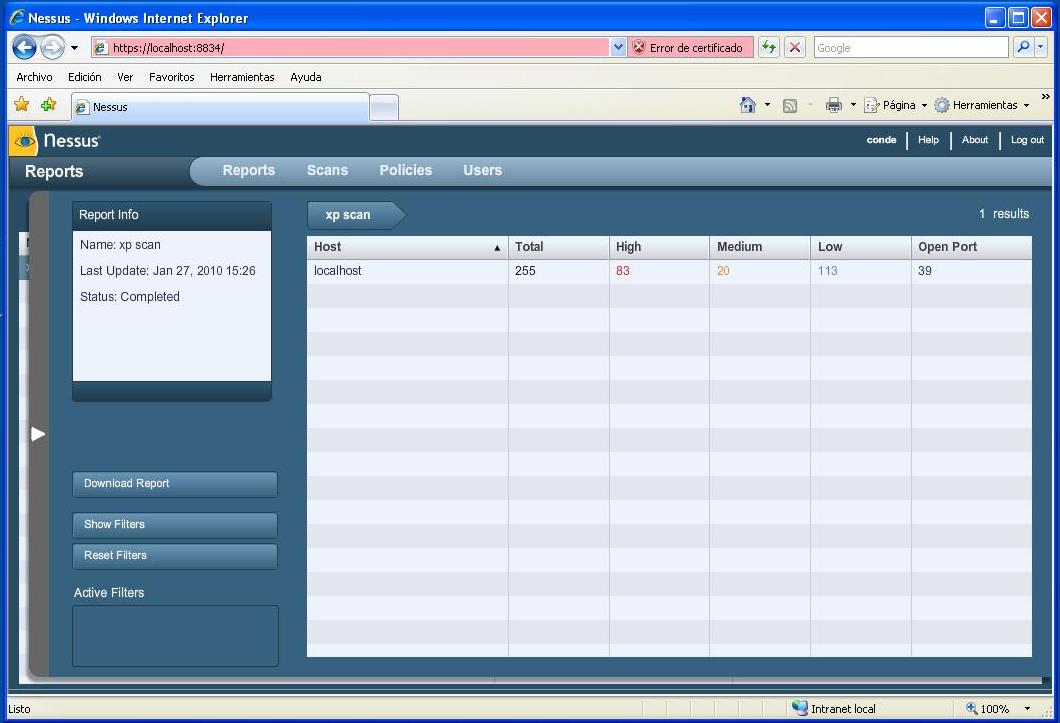
Abrimos el informe y podemos ver un sumario de los resultados como número de máquinas, vulnerabilidades y puertos.  Para ver los detalles pinchamos encima de una máquina.

When opening the report we can see a summary of the results such as number of machines, vulnerabilities and ports.  To view more details click on a system.
nessus11

12)

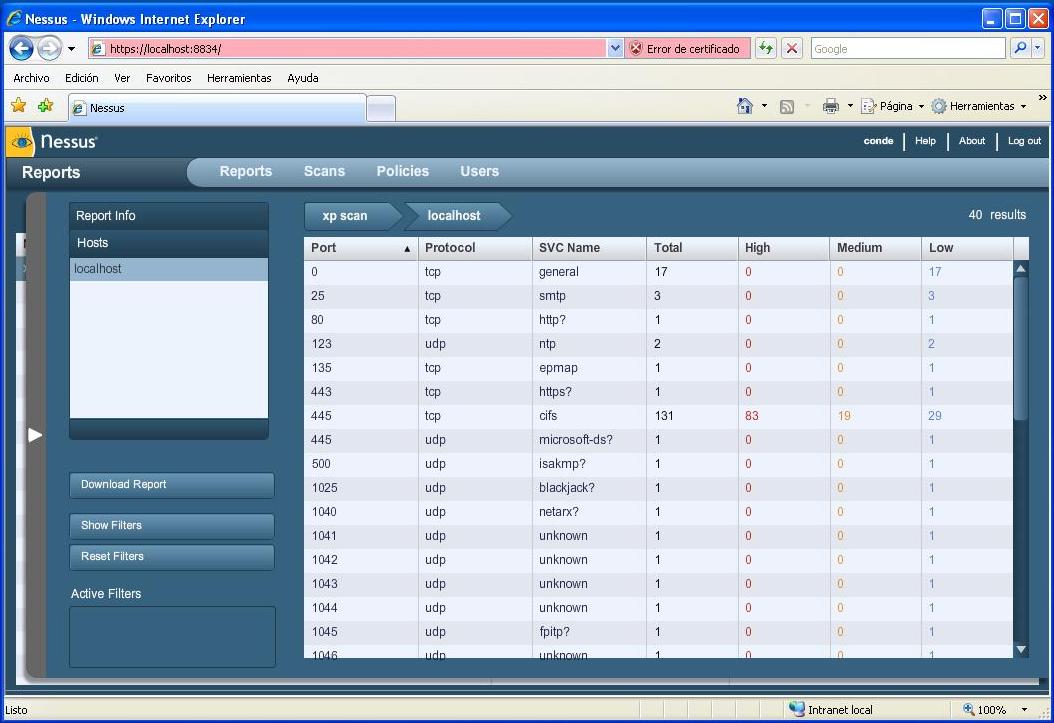
Podemos ver los puertos y las vulnerabilidades asociadas de nuestra máquina escaneada. Pinchando encima del puerto veremos más detalles.

We can see the ports and the associated vulnerabilities of the scanned system. By clicking on top of a port we will see more details.
nessus12

13)

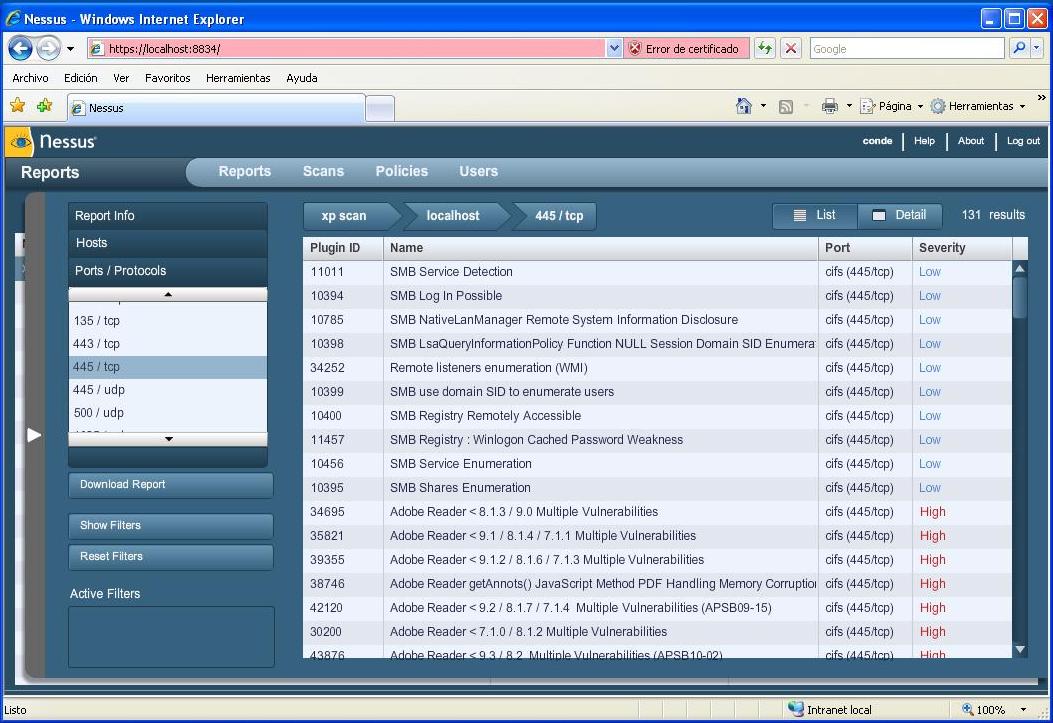
Podemos apreciar la cantidad de vulnerabilidades, muchas de ellas de una criticidad alta. Estos resultados fueron obtenidos por las credenciales del punto 4 por lo que siempre es recomendable realizar el escaneo con credenciales de administrador.

 We can see a lot of vulnerabilities, many highly critical. These results were obtained from the steps 4 to enter credentials, and that is why it is always recommended to do the scanning with administrator credentials.
nessus13

14)

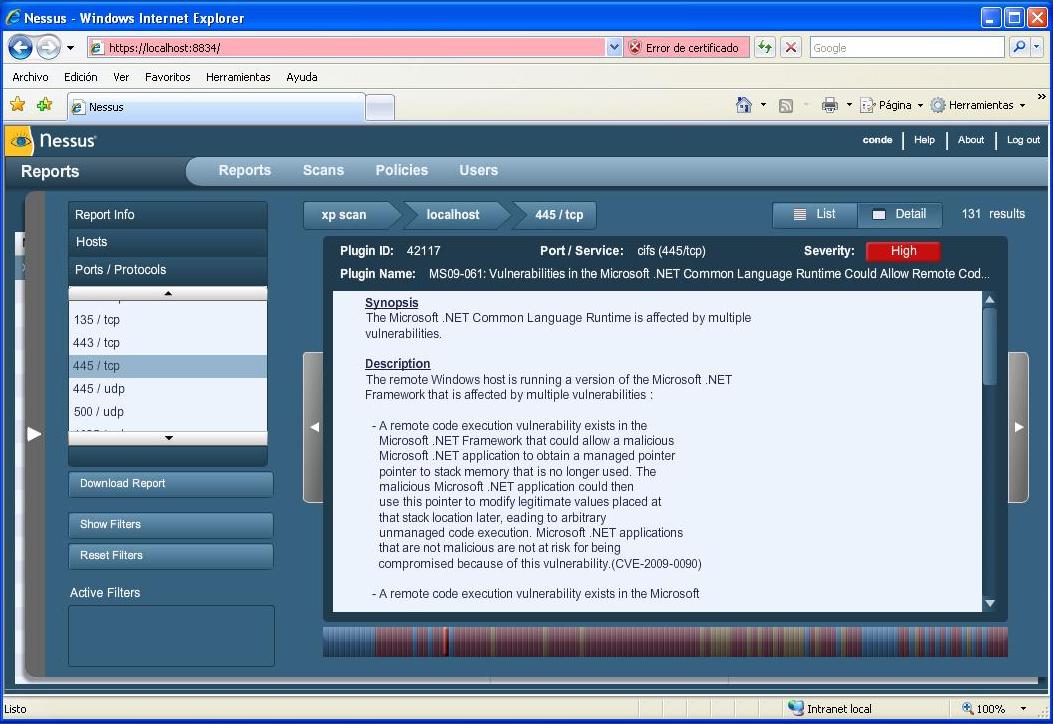
Hemos seleccionado una vulnerabilidad crítica para ver más en detalle donde se nos explica impacto y solución además de enlaces externos donde encontrar más información. Nota: La barra multicolor (azul, rojo y amarillo) abajo nos permite pinchar sobre ella para desplazarnos cómodamente por las vulnerabilidades.

We have selected a critical vulnerability to view more details where impact and solution are explained apart from external links where to find more information. Note: the multi-colored bar (blue, red and yellow) below allows us to click it to move around the vulnerabilities more comfortably.
nessus14

15)

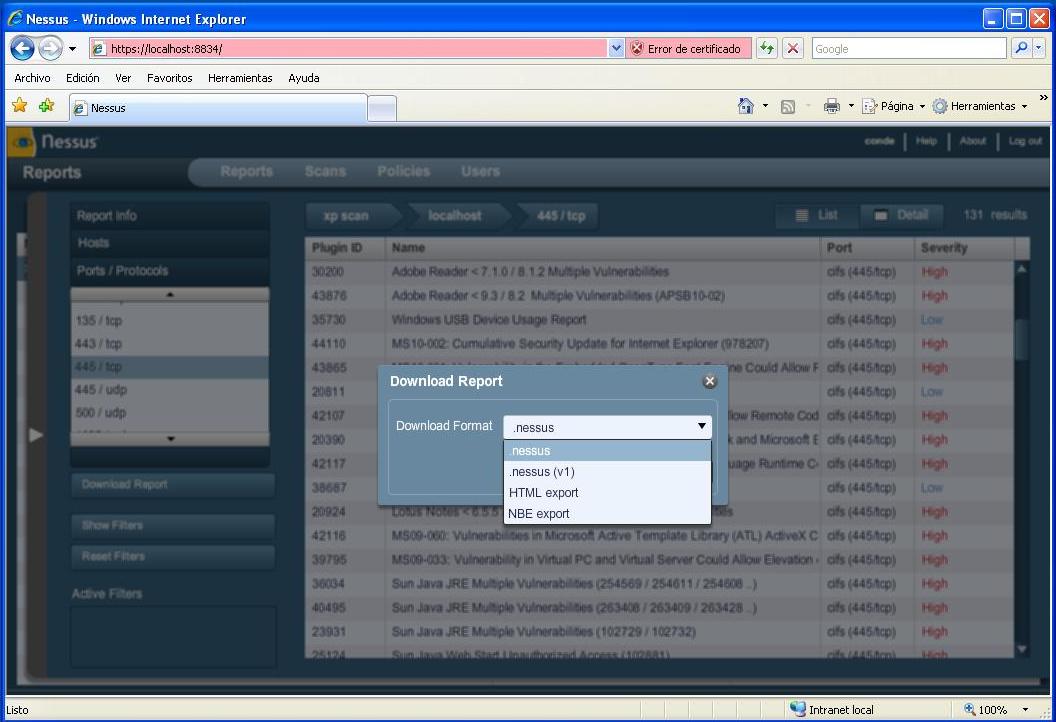
Ahora si queremos podemos generar un informe en algún formato de los disponibles por Nessus (HTML, .nessus basado en XML o NBE) Recordad que para el formato .nessus Excel 2007 es vuestro amigo 🙂

Now if we want we can generate a report in some format available by Nessus (.nessus based on XML, NBE or HTML) remember that for .nessus format Excel 2007 is your friend 🙂
nessus15

16)

Informe en HTML.

HTML report.

nessus16

17)

Y eso es todo amigos!

And that’s all folks!
nessus17

Como podéis ver realizar un escaneo mediante el nuevo Nessus es fácil e intuitivo y es una herramienta recomendada para cualquier profesional de la seguridad. En futures posts os contaré usos más avanzados de Nessus.

Los informes que genera son mejorables, pero nada es perfecto 🙂

Existe una versión open source alternativa llamada OpenVAS pero recibes lo que das 😉

¿Qué os ha parecido? ¿Cuál es vuestro escáner de vulnerabilidades favorito?

As you can see performing a scan through the new Nessus is easy and intuitive and is a recommended tool for any security professional. In future posts I will show you more advanced uses of Nessus.

The generated reports could be better, but nothing is perfect 🙂

There is an open source alternative called OpenVAS but you get what you give 😉

What are your thoughts on this? What is your favorite vulnerability scanner?

— SRF

Posted in Pentest, Security | 2 Comments

Blast from the past: my security presentations

He recopilado muchas de mis presentaciones públicas durante los años que espero sean de vuestro interés 🙂

———————————————————————————————————————————————–

I have collected many of my public presentations during the years and I hope you would like them 🙂

— SRF

Posted in Conference, Microsoft, OWASP, Security | Leave a comment

www.eu2010.es $ecurity $candal (aka $pain is Different)

España desde el 1 de Enero es la encargada de la Presidencia de la EU durante los próximos 6 meses y con este fin se ha creado un portal www.eu2010.es que se anuncio a bombo y platillo en todos los medios.

El escándalo salto ayer, 4 días de la publicación de la web, cuando un atacante identifico una vulnerabilidad de Cross-Site Scripting (XSS) permitiéndole inyectar código en el motor de búsqueda de la web. Dicho código colocaba una foto de Mr. Bean.

Si bien es cierto que esta vulnerabilidad tiene una criticidad baja a  mí entender existen otros problemas:

  1. Las vulnerabilidades XSS no deben ser infravaloras ya que permiten realizar ataques mucho más sofisticados que atacar el navegador del cliente.
  2. Este evento es un claro ejemplo que no por usar soluciones Open Source se es más seguro automáticamente. La seguridad es un proceso y por eso tenemos metodologías como MS SDL y OWASP CLASP.
  3. Enlazando con el punto 2 un WAF podría haberles salvado el mal trago y en la línea Open Source tenemos el ModSecurity.

Como no podía ser de otra manera el Gobierno niega que el portal haya sido “hackeado” y en cierta manera tiene razón aunque no debemos olvidar que si existía una vulnerabilidad que no debería haber sucedido en primer lugar.  

Este ataque XSS  es más anecdótico que otra cosa pero el verdadero escándalo que ha destapado este evento es el alto coste de soporte técnico y seguridad que el Gobierno ha pagado a Telefónica: 11,9 millones de Euros.

Sorprende la desorbitada cifra para un portal con una duración de 6 meses y utilizando soluciones Open Source. Esto sí que es un verdadero escándalo y una vergüenza.

———————————————————————————————————————————————–

Spain starting January 1 is in charge of the Presidency of the EU during the next 6 months and for this purpose the portal www.eu2010.es was created and announced in all media.

The scandal jumped yesterday, 4 days after the publication of the web, when an attacker identify a vulnerability of Cross-site Scripting (XSS) allowing to inject code into the web search engine. That code placed a photo of Mr. Bean.

While it is true that this vulnerability has a low criticality there are other problems:

  1. XSS vulnerabilities should not be underestimated as they allow performing more sophisticated attacks that just attacking the client browser.
  2. This event is a clear example that using Open Source solutions is not more secure automatically. Security is a process and therefore we have methodologies such as MS SDL and OWASP CLASP.
  3. Linking with point 2 a WAF could have safe them some troubles and keeping with Open Source we have ModSecurity.

It could not be otherwise the Government denies that the portal has been “hacked” and somehow is right but we must not forget that there was a vulnerability that should not have happened in the first place. 

This XSS attack is more anecdotal than anything else but the real scandal this event has uncovered is the high cost of technical support and security that the Government has paid to Telefónica: 11.9 million Euros.

Is surprising the huge figure for a portal with a duration of 6 months and using Open Source solutions. This is scandalous and disgraceful.

— SRF

Posted in Security | Leave a comment

XMAS Hangover and 2010 Roadmap

Querido lectores desearos un prospero 2010 y espero que hayáis tenido unas buenas fiestas y ya estéis recuperados 🙂

Para 2010 desde CyberSpace Insecurity 2.X esperamos traeros post innovadores sobre los temas que nos interesan.

Feliz 2010

Dear readers I want to wish you a prosper 2010 and I hope you have had good holydays and have already recover 🙂

By 2010 from CyberSpace Insecurity 2.X we hope to bring innovator posts on topics that interest us

Happy 2010

Posted in Uncategorized | Leave a comment

Network Authentication Cracking at speed of light

ES: Las viejas técnicas nunca mueran y ataques de fuerza bruta contra autenticación de red no es ningún excepción.  Desde hace años existen este tipo de herramientas como pueden ser Brutus y HTC Hydra además es bien sabido que los “malos” han desarrollado sistemas masivos para realizar estos ataques en Internet a gran escala.

Ahora tenemos una nueva e interesante herramienta llamada Ncrack desarrollada por ithilgore y Fyodor el autor de Nmap. Es por eso que Ncrack sigue la misma línea que Nmap a lo que interface y comandos se refiere y nos permite realizar ataques de fuerza bruta a una velocidad de vértigo!!!

Por el momento está limitado a pocos protocolos como son Telnet, FTP, HTTP Basic y SSH pero son un buen comienzo 🙂

Además de la velocidad tiene otras características interesantes como son:

  • Salva la sesión y poder continuar en otro momento
  • Compatibilidad con Nmap
  • Trae unas listas de las contraseñas más comunes
  • Fácil desarrollar nuevos protocolos

Examinando los listados de contraseñas podemos ver las típicas y contraseñas reales basadas en “hackeos” de myspace, phpbb y Hotmail.  Tranquilo que mis contraseñas no están 🙂

Desde luego una herramienta para tener en la caja de herramientas cuando tengas que realizar un test de intrusión.

Ncrack

 US: Old techniques never die and brute-force against network authentication is no exception.  For years there have been such tools as Brutus and HTC Hydra and is well known that the “bad guys” have developed massive systems to perform these attacks on Internet at a large-scale.

We now have an exciting new tool called Ncrack developed by ithilgore and Fyodor Nmap’s author. This is why Ncrack follows the same style as Nmap regarding interface and commands and allows us to perform brute-force attacks at a speed of light!!!

Is currently limited to few protocols such as Telnet, FTP, HTTP Basic, and SSH but is a good starting point 🙂

In addition to the speed it has other interesting features such as:

• Saves session and continues at a later time

• Support for Nmap

• Brings a few lists of common passwords

• Easy to develop new protocols

Examining the password listings we can see common and real passwords based on 0wned of myspace, phpbb and Hotmail.  Don’t worry my passwords are not in the lists 🙂

Truly a tool to have in the Toolbox when you have to perform a pen testing.

Ncrack

— SRF

Posted in Pentest, Security | Leave a comment

Snow, Technology Failures on the Road and what else!

ESP: Me acabo de levantar y al asomarme por la ventana veo nieve! Desde luego que viste las navidades aunque en Madrid no pasara de un día nevado.

Durante mis viajes me suelo encontrar mensajes de errores en las pantallas de información de sistemas informáticos y por regla siempre saco una foto lo que llamo “Documentando Errores en la Tecnología Diaria”. Las fotos son un buen ejemplo que ningún sistema es infalible ya sea Windows o Linux y todavía queda mucho por hacer. 🙂

US: I just did wake up and looked out of the window and can see snow! Certainly dresses the Christmas but in Madrid should not last more than a day.  

During my travels I usually find error messages on the screens of computer systems and my rule is to always take a photo what I call “Daily Technology Errors Documentary”.  These photos are good examples that any system is not foolproof either Windows or Linux and much remains to be done. 🙂

— SRF

Posted in Uncategorized | Leave a comment

The New Ferrovial, Initial Public Offering

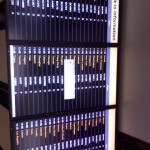
ESP: El pasado Lunes fue doblemente interesante ya que estuve en mi primera salida a bolsa de una empresa, en este caso la fusión entre Ferrovial y Cintra, con campanada incluida y en segundo lugar estuve visitando la bolsa de Madrid. Mientras estábamos en el cocktail veíamos como subían las acciones en las enormes pantallas de la bolsa con un precio de salida de 7,77 Euros y cerrando ese día en 8,09 Euros. Me sentía como un tiburón de Wall Street 🙂

Os dejo una foto del evento.

US: Past Monday was doubly interesting since I was in my first initial public offering of a company, in this case the merger between Ferrovial and Cintra, with ringing bell included and secondly I was visiting Madrid Stock Exchange. While we were in the cocktail we follow on huge screens how the actions climbed with a start price of 7.77 Euros and closing that day with 8.09 Euros. I felt like a Wall Street shark 🙂

I leave a photo of the event.

–SRF

The New Ferrovial

The New Ferrovial

Posted in Economics | Leave a comment

VisualSploit: Exploit Development Art

ESP: Un interesante movimiento estratégico por parte de ImmunitySec es incluir VisualSploit, herramienta para desarrollar exploits de forma visual y sin escribir código, dentro de CANVAS plataforma comercial de test de intrusión.  Este movimiento tiene 2 beneficios:

  1. Ahorro de coste: La licencia de VisualSploit costaba $399 primer año y luego $150 / año y la de CANVAS cuesta alrededor de $3500 anual.
  2. Al integrar las dos herramientas podemos escribir exploits de formas más rápida con VisualSploit y utilizarlos directamente en CANVAS.

Y para los que no se hayan enterado el próximo viernes 4 de diciembre ImmunitySec ofrecerá un Webcast de cómo identificar, escribir y utilizar exploits utilizando ImmunitySec Debugger, VisualExploit y CANVAS.

US: An interesting movement strategy on part of ImmunitySec is to include VisualSploit, tool to develop exploits visually and without writing code, inside CANVAS commercial penetration testing platform.  This movement has two benefits:

  1. Cost savings: VisualSploit license cost $399 first year and then $150 / year and CANVAS costs around $3500 annual.
  2. By integrating the two tools we can write faster exploits with VisualSploit and use them directly on CANVAS.

For those who have not heard Friday 4 December ImmunitySec will host a Webcast on how to identify, write, and use exploits using ImmunitySec Debugger, VisualExploit and CANVAS.

ImmunitySec
http://immunitysec.com/

VisualSploit Webcast
https://forum.immunityinc.com/board/thread/1076/visualsploit-webex-demo-friday-december/?page=1#post-1076

— SRF

Posted in Pentest, Security | Leave a comment

Android as Wireless Recon Device

ESP: Una de mis últimas adquisiciones es el telefoneo THC Magic con el sistema operativo Android de Google. Mi elección por este aparato es 1) por no tener un Ipod como todo el mundo y 2) por el potencial que ofrece. Tengo que confesar que estoy encantado y lo recomiendo.

Como no podía ser de otra manera  estoy investigando las posibilidades de usar el aparato para realizar auditorías wireless y la verdad es que tiene buenos programas para ello. Para sacarle todo el jugo al Android debemos desbloquearlo, privilegios root,  pero realmente no hace falta realizar esta accion si solo queremos identificar redes inalámbricas. En algunos foros se comenta la posibilidad de realizar inyecciones, podríamos romper las redes de forma activa, pero aun no he tenido tiendo de probar esto ya os mantendré informados.

Lo cierto es que  utilizo el Android como mi primera herramienta cuando estoy realizando una identificación de redes inalámbricas en una zona. En las redes abiertas podríamos conectarnos y realizar otras operaciones pero eso ya es tema de otro post. 🙂

Las aplicaciones que utilizo y están disponibles en Android Market son:

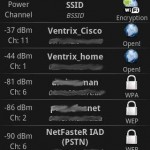
  • WifiScanner: Un simple scanner que identifica las redes (abiertas, WEP Y WPA)
  • Wardrive: Muestra las redes en un mapa usando Google Maps.
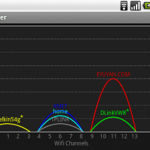
  • WifiAnalyzer: Realiza un análisis del espectro inalámbrico y nos lo enseña gráficamente.

Otros programas interesantes pueden ser:

  • WifiScan: Scanner de pago con buenas críticas.
  • HiddenSSID Enabler: Nos revela los SSID oculto.

US: One of my latest acquisitions is the THC Magic phone with the Google Android OS. The reasons I did choice this device are 1) not having an iPod as everybody else and 2) the huge potential it offers. I must say that I am delighted and I strongly recommended it.

It could not be other way I’m investigating the possibilities of using the device for auditing wireless and the truth is that it has good programs to do so. To get the juice of the Android we must unlock it, become root, but in reality you don’t need to do this if you only want to carry out surveys of wireless networks. Some forums talk about the  possibility of performing injections, we could break networks actively, but I have not yet had the time to test this but will keep you posted.

The fact is that I use the Android as my first tool when doing wireless network recon in a zone. For open networks we could connect and perform other actions but that is a topic for another post. 🙂

Applications that I use and are available on Android Market are:

  • WifiScanner: A simple scanner that identifies networks (Open, WEP and WPA)
  • Wardrive: Samples networks on a map using Google Maps.
  • WifiAnalyzer: Perform an analysis of the wireless spectrum and shows graphically.

Other interesting programs may include:

  • WifiScan: Commercial scanner with good reviews.
  • HiddenSSID Enabler:  reveals hidden SSID. 
Posted in Pentest, Security, Wireless | Leave a comment

IBWAS09 be there!

ESP: Si estáis por Madrid durante los días 10 y 11 de Diciembre no os podéis perder IBWAS09, organizado por OWASP (Capítulos Irlanda, Portugal y España) con una selección de ponentes de lujo! Nosotros estaremos 🙂 ¿y tú?

US: If you are in Madrid on 10 and 11 December don’t miss IBWAS09, organized by OWASP (chapters Ireland, Portugal and Spain) with an awesome speaker list! We will be there 🙂 ¿and you?

Posted in Conference, OWASP, Security | Leave a comment